Question
I was browsing Behance and came upon these pictures: http://www.behance.net/gallery/The-Little-Things/402879
I was wondering how he got this miniature style effect? I'm guessing a Gaussian Blur on a strip of the picture in Photoshop...but couldn't get right.
If you know how to make it, please give a stepped explanation. Thanks.
Answer
Basically you want to simulate the shallow depth of field you would get when photographing small objects. This can be done either with lens with tilt function (i.e. special purpose lens called either a tilt-shift or perspective control lens) or by selectively blurring an image in post.
It's not hard to do, but there is something you need to ensure in the original capture, and that is a high vantage point. This is a must, not only are most miniatures shot from above, but you need a steadily progressing depth from top to bottom. This is especially true when using a tilt-shift lens as your only option is a gradually increasing blur, it's possible to fake shallow depth of field from a ground level image but you would have to do an awful lot of very difficult masking if the furthest part of your scene is in the centre of the image, and the result wont look as good anyway.
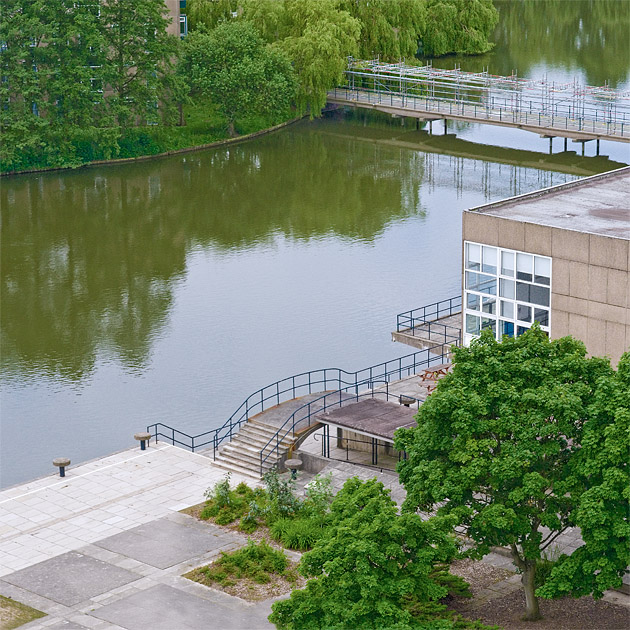
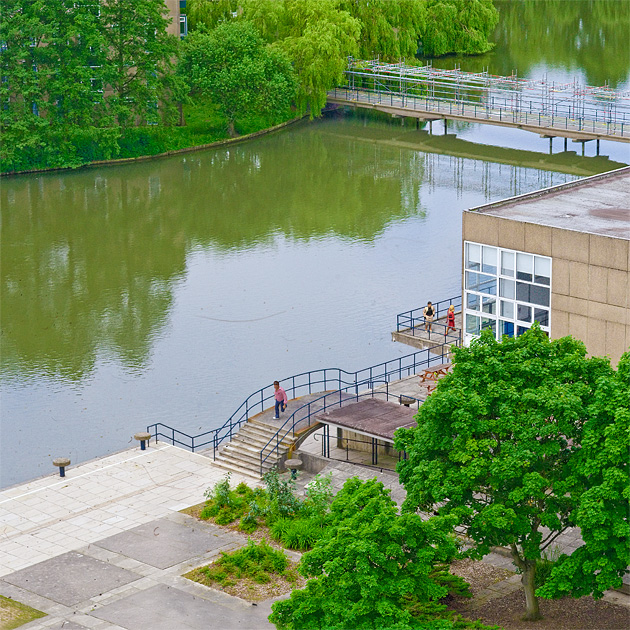
Here's a walkthrough of one of these I produced for the University of York magazine. Here's the original image (actually part of a panorama) shot from the back of a tower crane!
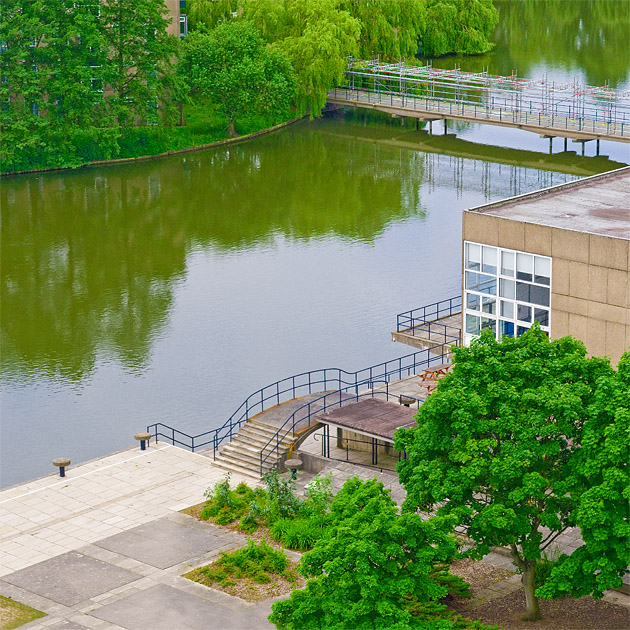
Next I played with the saturation and colours to make it look a bit like a model (if you look at model railways the trees are always an unnatural shade of green!)
The next few steps are not strictly necessary but I wanted to push the illusion of this being a model as far as I could! I photoshopped in in some dirt, hairs etc. and a few plastic model railway figures (again most of this was inspired by studying images of model railways on flickr):
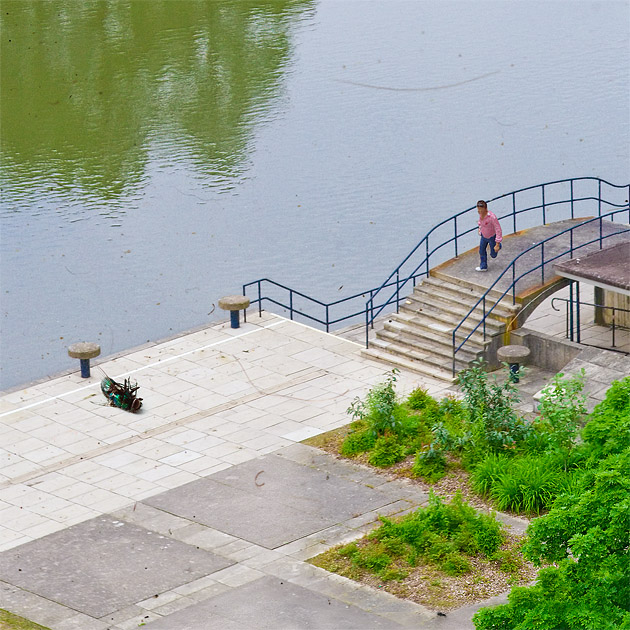
When doing this sort of thing it's important to add a shadow, even if very diffuse (the whole scene was shot on a cloudy day, so there were no strong shadows) to help ground the figures:
Here's the final prep'ed image (I decided the dead fly was too much!)
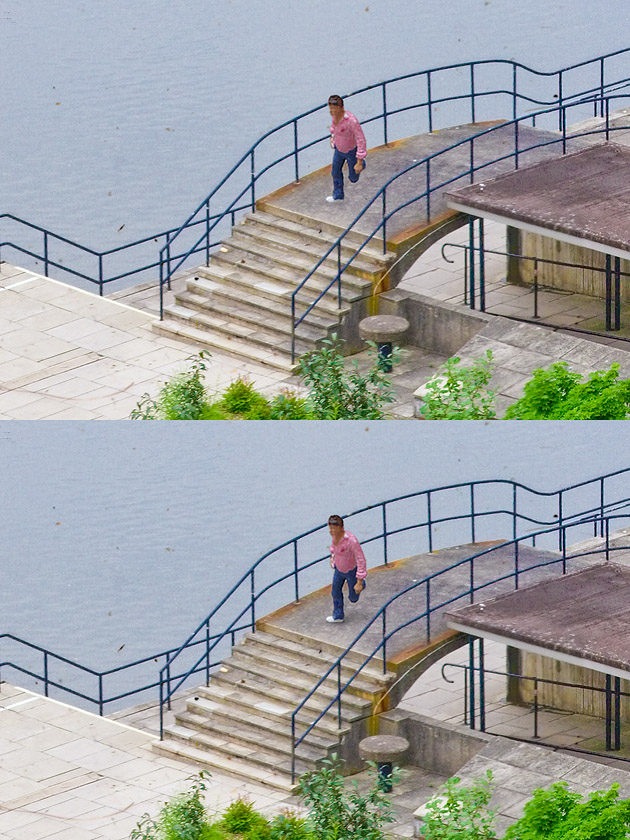
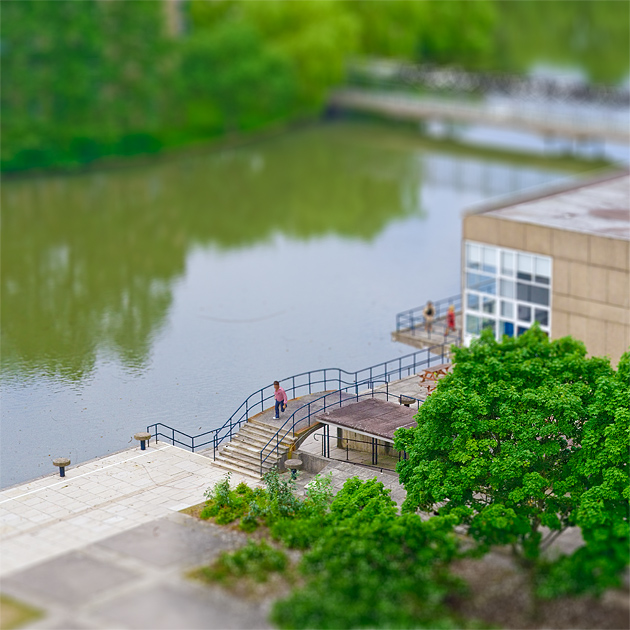
Now to do the actual blurring, now we want to simulate the model going out of focus, which means blurring with an increasing radius from top to bottom. The best way to achieve this is with the photoshop lens blur filter. This takes a "depth map" image, which is a greyscale image where the brightness indicates the radius of the blur at that point.
A simple gradient from top to bottom would do, but it gave the effect that the bottom of the building was more blurred than the top, which wouldn't happen in real life as they would both be at the same depth, to attempt to fix this I modified the depth map slightly:

Here's the final image. The effect isn't quite perfect, the trees in the foreground don't look quite right (a lot more fiddling with the depth map would have been required), but it was enough to fool a lot of people.
Check more discussion of this question.
No comments:
Post a Comment